
The Retail Fitout Process: A Step-by-Step Guide for Australian Businesses
Date Published
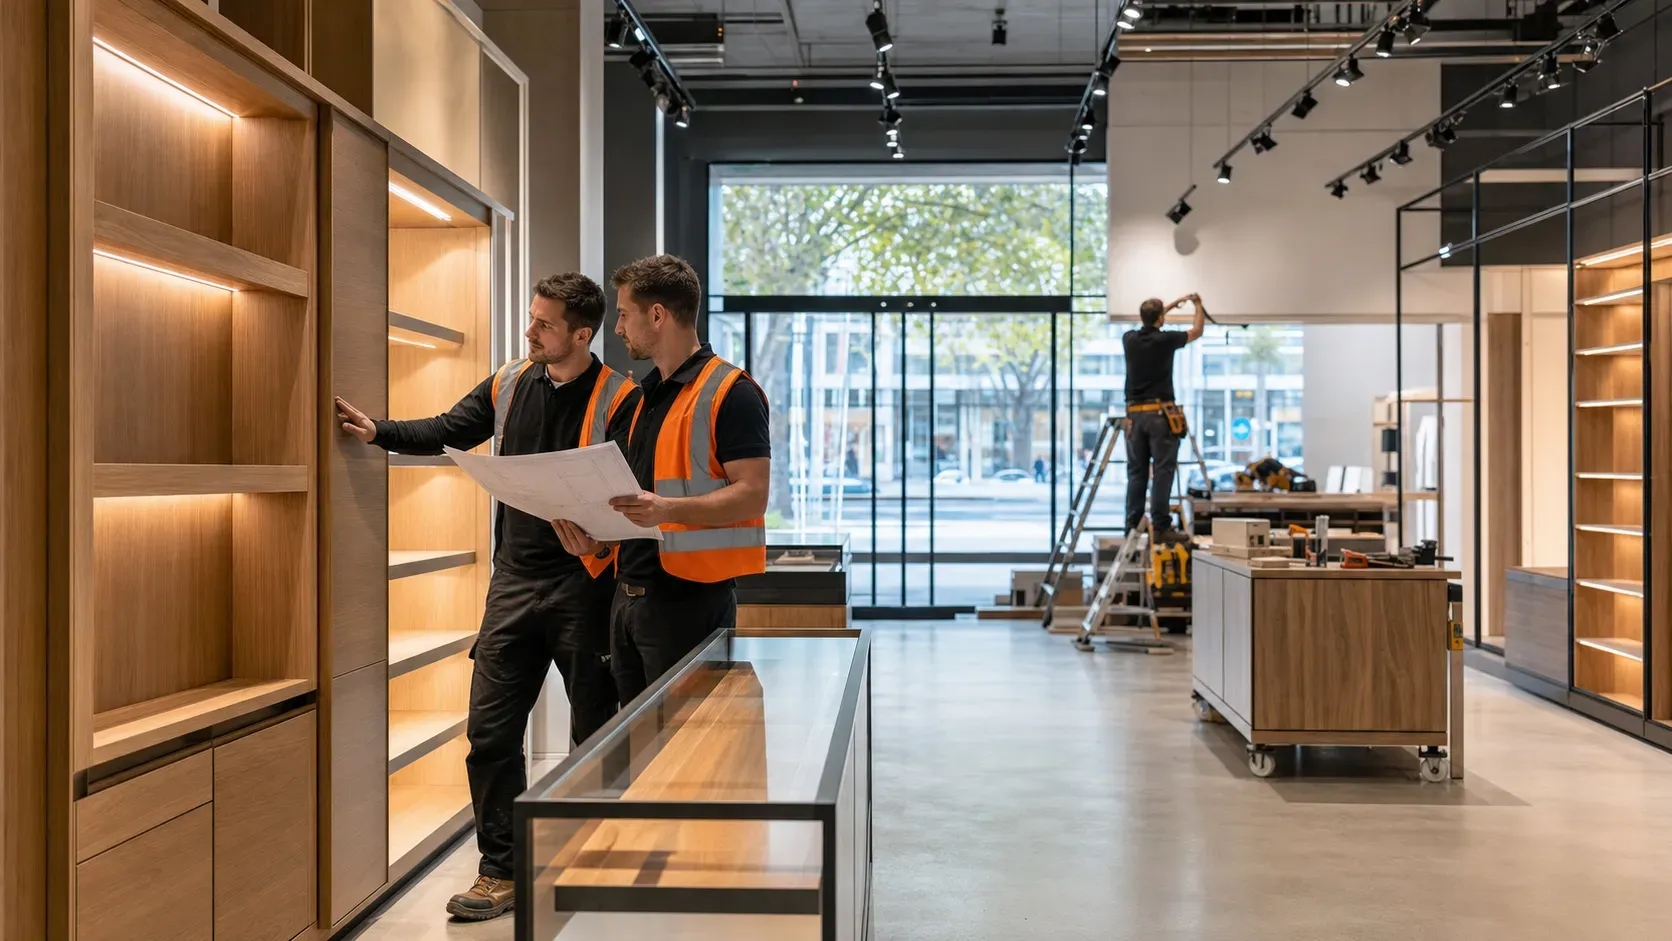
Opening or upgrading a retail store involves more than choosing finishes and installing displays. Every decision can affect your budget, timeline, compliance, and opening date.
The retail fitout process connects site checks, design, approvals, construction, and final handover. Missing one step can lead to variations, delays, or costly changes.
This guide explains each stage for Australian businesses, with practical advice for planning a retail fitout in Melbourne.
Fast Facts
- Start before signing: Check the permitted use, site services, landlord rules, and make-good obligations before committing to a tenancy.
- Plan the full program: Include design, approvals, procurement, construction, inspections, merchandising, and staff preparation.
- Define the complete budget: Allow for consultants, services, approvals, equipment, signage, certification, and project contingency.
- Control changes: Confirm the cost and time effect of every variation before authorising additional work.
- Protect the opening date: Leave time after handover for defect corrections, final documents, stock delivery, training, and system testing.
What Does the Retail Fitout Process Involve?
The retail fitout process turns an empty or outdated tenancy into a store that is ready to trade.
It covers site checks, briefing, design, approvals, pricing, procurement, construction, certification, and handover. Each stage affects the final cost and opening date.
A typical retail fitout follows eight steps:
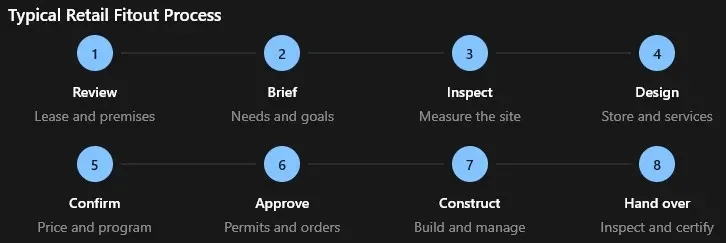
The eight key stages of a retail fitout, from reviewing the premises to completing inspections and handing over the finished store.
The physical build is only one part of the program. Design changes, approval delays, and late orders can extend the project before construction begins.
Steps 1 to 3: Check the Site, Set the Brief and Inspect the Premises
Careful preparation can prevent expensive changes later. These first steps confirm whether the tenancy suits your business and budget.
Step 1: Review the lease and site
Check the lease before approving a design or starting work. Confirm the permitted use, lease commencement date, and access conditions.
Review any landlord or shopping-centre fitout guide. It may control working hours, approved contractors, shopfront design, waste removal, and site protection.
Also check:
🔸 Landlord approval requirements
🔸 Signage and shopfront restrictions
🔸 Existing services and available capacity
🔸 Rent-free or fitout periods
🔸 Make-good obligations
🔸 Rules for deliveries and loading access
Business Victoria recommends reviewing lease terms, outgoings, permitted use, and make-good obligations. Seek legal advice if any requirement remains unclear.
Step 2: Prepare the project brief
The project brief explains what the store must achieve. It gives the designer and builder a clear starting point.
Include your target budget, opening date, product range, staff numbers, and brand requirements. Cover customer flow, displays, storage, security, technology, and staff facilities.
Separate essential items from optional upgrades. This makes cost reductions easier if the first estimate exceeds your budget.
Choose one person who can approve designs, finishes, and variations. Slow decisions can delay documentation, orders, and construction.
Step 3: Complete a site assessment
Arrange a detailed site inspection before finalising the layout or construction price.
The assessment should examine:
🔸 Site measurements and existing plans
🔸 Electrical supply and switchboards
🔸 Heating, cooling, and ventilation
🔸 Plumbing and drainage
🔸 Fire protection systems
🔸 Walls, floors, ceilings, and structure
🔸 Data, security, and communications
🔸 Loading access and working-hour restrictions
Hidden conditions can cause variations. Early inspections help the team identify risks before work begins.
Steps 4 and 5: Design the Store and Confirm the Commercial Scope
The design must support customers, employees, merchandise, and compliance. It must also remain practical to build.
Step 4: Develop and approve the design
Start with a concept layout showing entrances, displays, service counters, storage, and staff areas.
Test how customers will enter, browse, pay, and leave. Check sightlines, aisle widths, queue space, security, and accessible circulation.
The team can then prepare detailed drawings and specifications. These documents should coordinate lighting, power, data, plumbing, ventilation, fire services, signage, finishes, and joinery.
Most public-facing shops fall within the National Construction Code’s Class 6 classification. However, the correct classification depends on the premises and its use.
Accessibility should form part of the design from the start. Entrances, paths, doors, counters, and facilities may affect both compliance and customer comfort.
Obtain all required landlord, centre-management, or franchise approvals before construction.
Step 5: Confirm the price, contract, and program
Ask for a detailed proposal that explains the full scope. It should identify inclusions, exclusions, allowances, and assumptions.
A retail fitout budget may include:
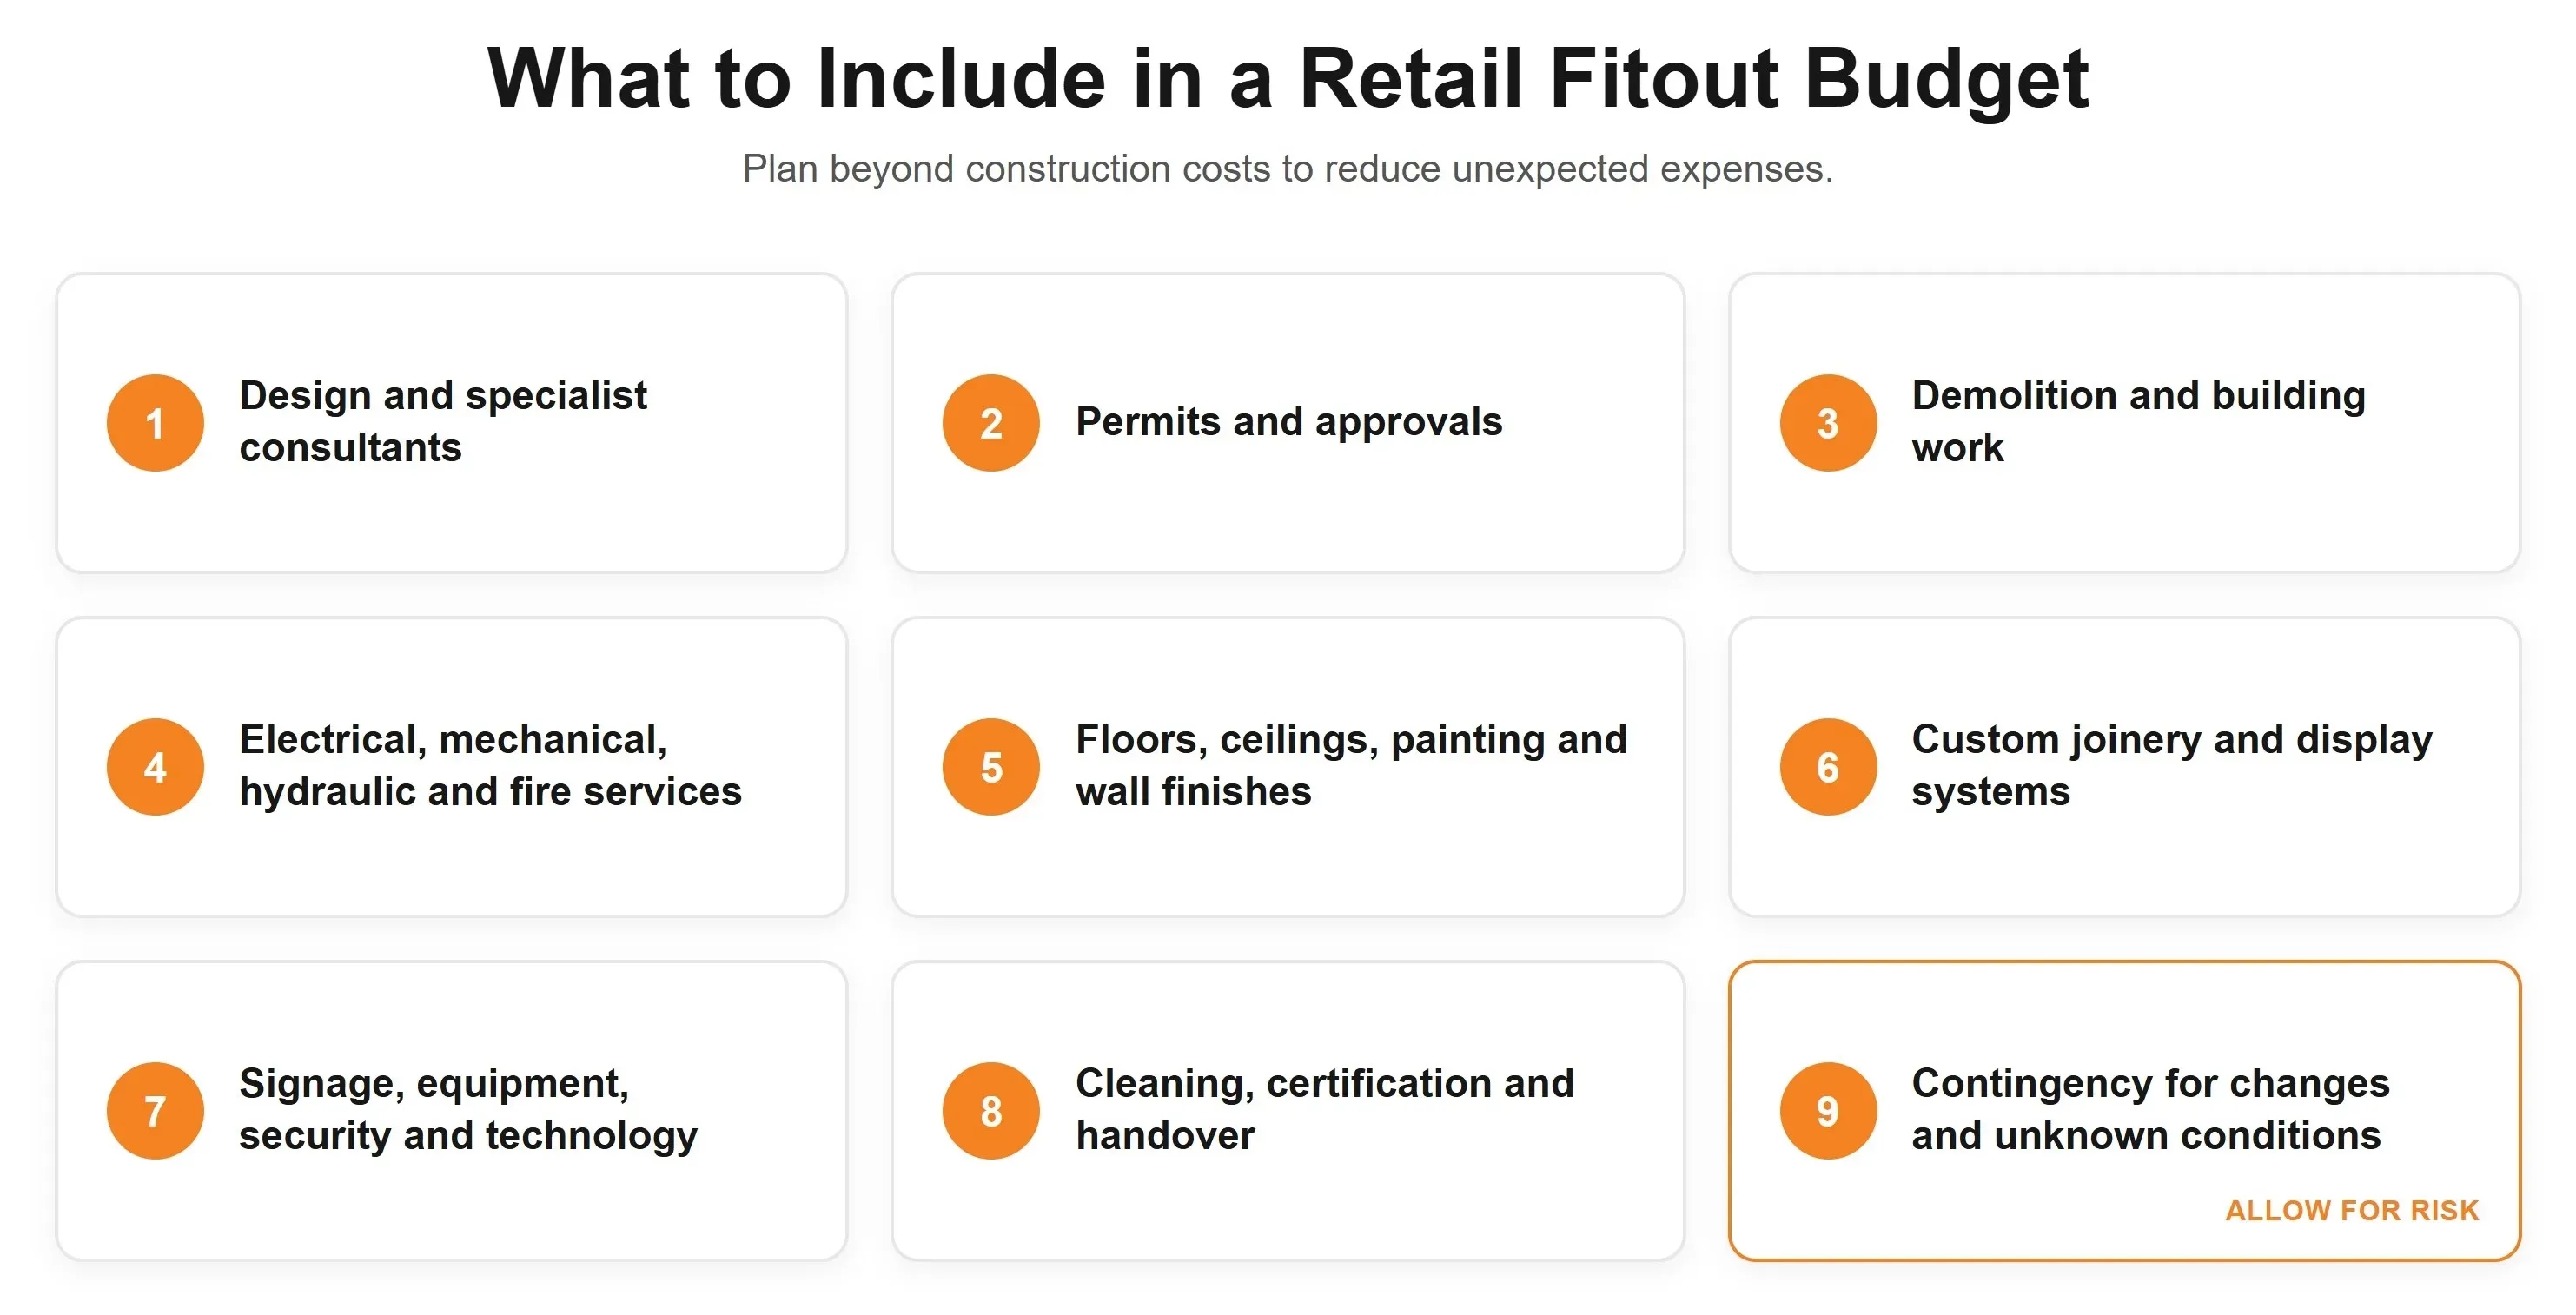
Nine costs to include when planning a retail fitout budget, from design and approvals to construction, handover, and contingency.
A square-metre estimate can help with early planning. However, it cannot reflect every site condition or operational requirement.
Compare quotations on the same scope. A lower quote may exclude services, approvals, equipment connections, or after-hours work.
The contract should define payment stages, responsibilities, completion requirements, and the variation process. The program should identify approval and decision deadlines.
Steps 6 and 7: Obtain Approvals, Order Materials and Build the Fitout
Approvals and procurement should follow a coordinated design. Starting work with incomplete information increases risk.
Step 6: Complete approvals and procurement
Retail fitout approval requirements vary by site and council. Do not assume landlord approval replaces statutory approval.
Planning or building approval may apply to internal works, business-use changes, shopfronts, signage, or structural changes. Ask the relevant council and building professionals what your project requires.
Order long-lead products when the design and budget allow. These may include:
🔸 Custom joinery
🔸 Shopfront glazing
🔸 Feature lighting
🔸 Switchboards and specialist equipment
🔸 Branded fixtures
🔸 Signage and imported finishes
Confirm product availability before building the project program around a proposed delivery date. Record approved alternatives for critical materials where practical.
Step 7: Construct and manage the fitout
Construction usually begins with site establishment, protection, and demolition. Services rough-in, partitions, ceilings, joinery, finishes, fixtures, and signage follow.
The exact sequence depends on the design and tenancy conditions.
Regular site meetings help the team review progress, upcoming decisions, safety, deliveries, and emerging risks. Keep approvals and instructions in writing.
Use a formal variation process when the scope changes. Confirm the additional cost and time before authorising the work.
Coordinate noisy activities, loading access, and service shutdowns with the landlord and nearby businesses. This reduces disruption and complaints.
Step 8: Inspect, Certify and Prepare the Store for Opening
Construction completion does not always mean the store can open immediately. Testing, corrections, merchandising, and staff preparation still require time.
Complete a practical-completion inspection and record unfinished or defective work. Assign responsibility and a completion date to each item.
Test the store’s:
🔸 Lighting and power
🔸 Data and point-of-sale connections
🔸 Heating, cooling, and ventilation
🔸 Plumbing and drainage
🔸 Fire and security systems
🔸 Doors, locks, fixtures, and equipment
Collect all required approvals, certificates, warranties, manuals, and as-built information. Electrical installation work in Victoria requires a Certificate of Electrical Safety.
Allow time for final cleaning, stock delivery, merchandising, staff training, and technology testing. Avoid planning the opening for the morning after handover.
A short buffer can protect the launch if a defect, delivery, or final approval takes longer than expected.
Plan Your Melbourne Retail Fitout With Fewer Surprises
A reliable retail fitout process connects the lease, design, approvals, budget, procurement, and construction program.
Early site checks reduce unknown costs. Detailed documents improve quote comparisons. Timely decisions help protect the opening date.
Finex Fitouts can coordinate design, construction, and project management for Melbourne retail and showroom projects.
Speak with the Finex team before committing to your construction schedule. A clear review of the premises, scope, and budget can establish a practical path to opening.
Retail Fitout FAQs
How long does a retail fitout take in Melbourne?
A retail fitout can take several weeks or longer, depending on its size, design, approvals and material availability. The full program should include briefing, documentation, permits, procurement, construction, inspections and opening preparation.
Does a retail fitout require council or building approval?
Some retail fitouts require planning, building, signage or landlord approval. Requirements depend on the location, proposed use and scope of work. Check with the relevant council and qualified building professionals before construction begins.
What should a retail fitout budget include?
A retail fitout budget should include design, consultants, approvals, construction, building services, finishes, joinery, equipment, signage, certification and handover. Include a contingency for approved changes and unknown site conditions.
Confused about office renovation vs fitout? Learn costs, timelines, and how to choose the right option for your business.
Compare turnkey fitouts and separate trades for Melbourne commercial projects, including cost, risk, delays, and downtime.